Prerequisites
The following instructions require that you already have the Klaviyo Toolkit plugin for WooCommerce installed and activated.
Instructions
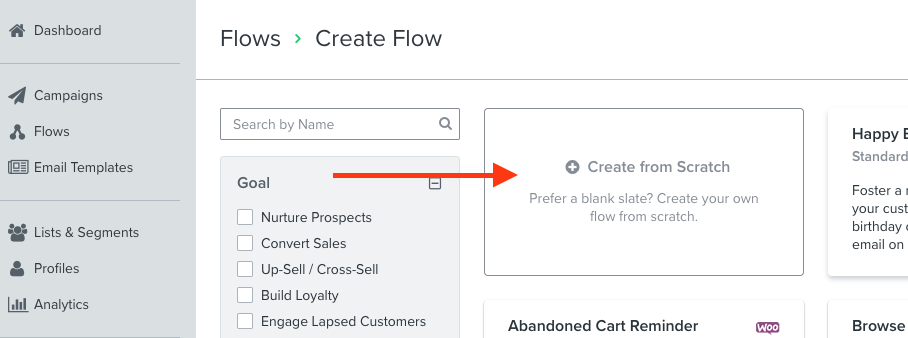
- Log into your Klaviyo account, navigate to the flows page, and click the “Create Flow” button

2. Choose “Create from Scratch”, give it a name and click the “Create Flow” button.
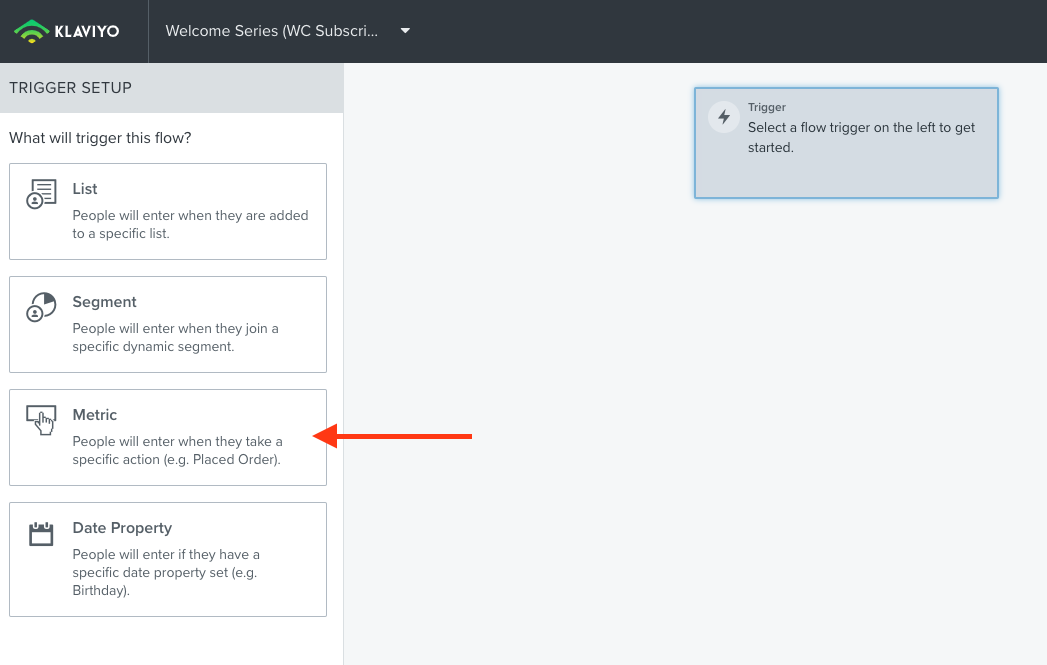
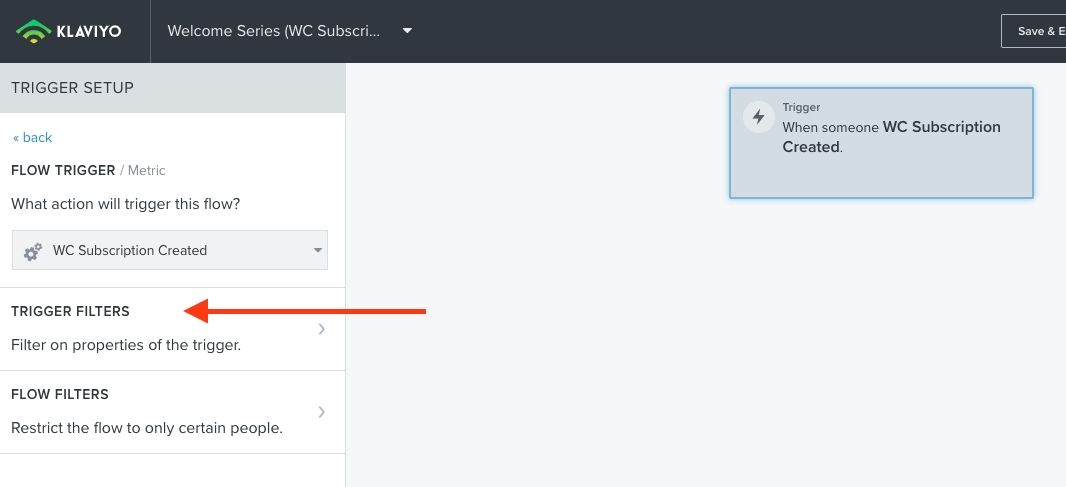
3. On the left side, select “Metric” as the flow trigger.
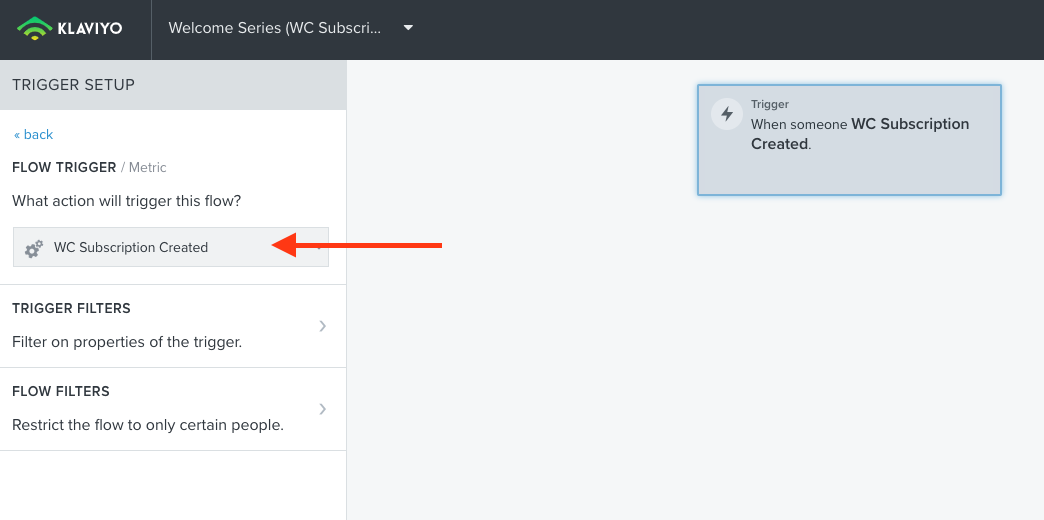
4. Select the “WC Subscription Created” metric as the trigger.
ℹ️ Important: This metric will only show if the “WC Subscription Created Event” is turned on in the Klaviyo Toolkit settings and if your store has had at least 1 new subscription order since installing and activating the Klaviyo Toolkit plugin. If you do not see this event yet, please wait until you receive a new subscription order.
- Optional: To further segment this flow, you can use the following “trigger filters”:
- Attributed Flow
- Attributed Message
- Email Domain
- Plan
- PlanID
- PlanInterval
- PlanName
- PlanTrial
- PlanTrialEndDate
- PlanVariationID
- $value
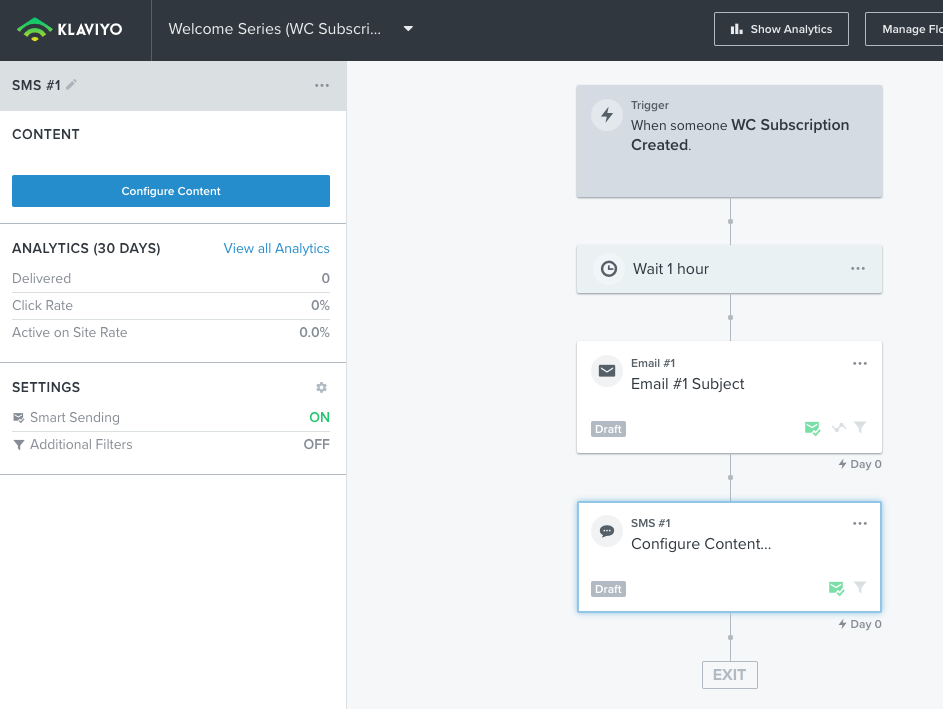
6. Finally, add your whichever time delays, emails and SMS you’d like to include as part of your flow. Save and exit.