How it works
1. A shopper initiates the checkout process & we generate a coupon
First, when an existing customer starts checkout, the Klaviyo Toolkit plugin will automatically create a coupon code and limit the use of that code only to this person’s email address. If they aren’t logged in or are a new shopper, we’ll generate a coupon when they enter their email address in the email field on checkout.
2. We pass the coupon details to Klaviyo.
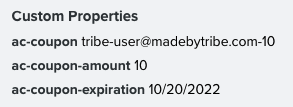
The plugin then connects to Klaviyo’s API and adds this coupon info to your shopper’s profile as custom profile properties.

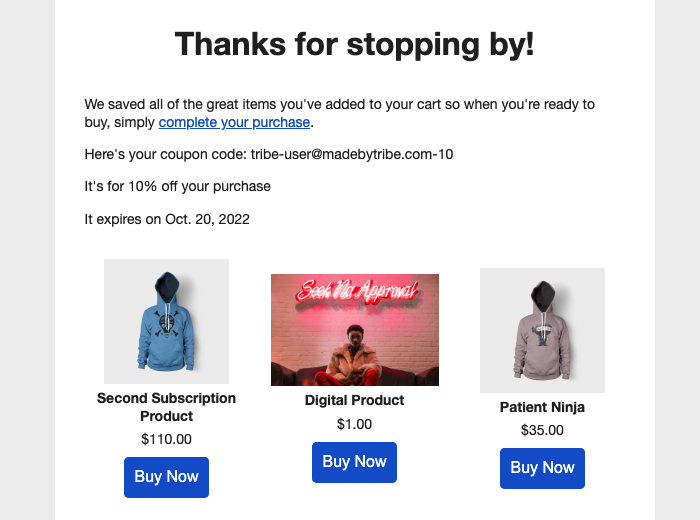
3. The coupon is shown in flow emails.
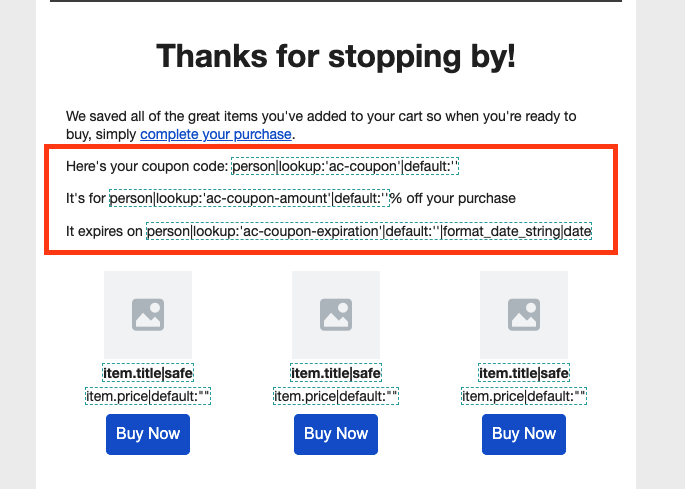
In your flow’s emails, you can then populate this info directly into the email with template tags.

How to set it up
Before we begin, you’ll need the Klaviyo Toolkit plugin installed and activated on your site. If you don’t have it yet, you can purchase it here.
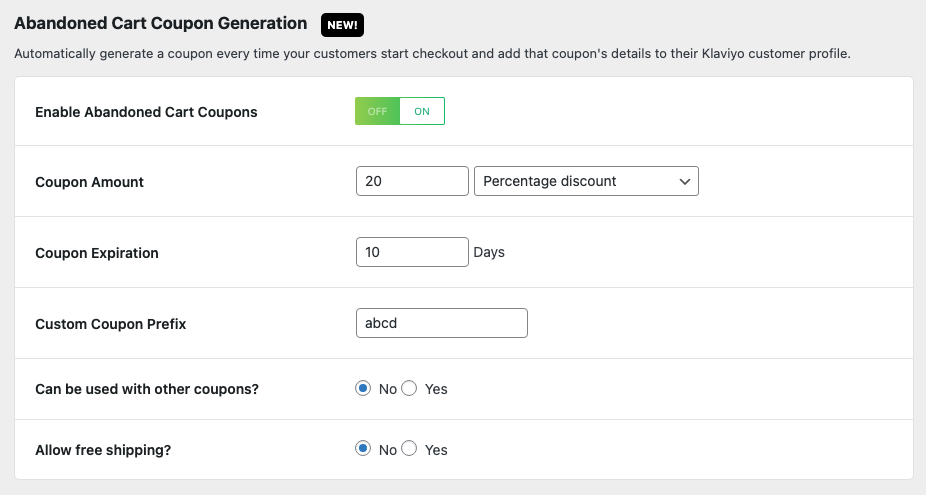
1. First, you’ll want to set the coupon generation settings. These pretty much mirror the default WooCommerce coupon settings.

- Enable Abandoned Cart Coupons – This turns the option on/off.
- Coupon amount – We support only fixed or percentage cart discounts now but will add support for others in future versions. (required)
- Coupon expiration – How many days from coupon generation do you want this coupon to expire? (optional)
- Custom coupon prefix – Add a prefix text to your coupon code (optional)
- Can it be used with other coupons? – Yes = people can stack coupons. No = Can’t use with other coupons.
- Allow free shipping – Sets the “allow free shipping” option in the generated coupon.
2. Next, you’ll want to add the appropriate Klaviyo template tags in your flow emails to pull the codes in:
Coupon code – This tag looks up the coupon code in the customer’s Klaviyo profile. Replace the “ac” portion with the prefix you set in step 1.
{{ person|lookup:'ac-coupon'|default:'' }}Coupon expiration date – This tag looks up the coupon expiration date in the customer’s Klaviyo profile and formats it to something human readable. Again, replace the “ac” portion with the prefix you set in step 1.
{{ person|lookup:'ac-coupon-expiration'|default:''|format_date_string|date }}Coupon amount – This tag looks up the coupon amount in the customer’s Klaviyo profile. Again, replace the “ac” portion with the prefix you set in step 1.
{{ person|lookup:'ac-coupon-amount'|default:'' }}When your customers receive their email, assuming they’ve already gone through checkout and generated a coupon code, they’ll see something like:

